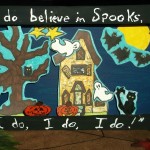
Kids always seem to love making dioramas. In a way, it’s like building a little town or farm of their own. I think making dioramas are great for fueling the imagination. Because I know that some teachers are very limited in the amount of time allotted for art class, I have drawn some of the Halloween items, but this is not to limit the kids’ choices. They are welcome to add items or completely draw their own scene, as long as it is Halloween themed. Although this art project is suitable for any class, you’ll find this project, named “Halloween Diorama,” in the 4th Grade Projects Gallery in the sidebar. Click on the image above for a larger image.
SPOOKS DIORAMA
PERSPECTIVE BY CLASS
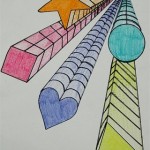 Perspective is the appearance to the eye of objects in respect to their relative distance and positions. This year we will be working with all our classes to include perspective in our drawings. Perspective gives our drawings a 3-D (three dimensional) appearance. We will discuss what makes a picture look 3-D. The farther away something is, the smaller it appears and has less detail. It also appears nearer the top of the page. Imagine yourself standing on the side of a road, a car is coming toward you from a long distance away. As the car gets nearer, it looks bigger and more colorful. Closer objects will be larger, with more detail, and closer to the bottom of the page. Each of the six grades have a lesson on perspective. The first and second grades use pre-cut, colored shapes. The third, fourth, fifth and sixth grades use stencils in their projects. For directions for each grade, look for “Perspective” the Grade Projects Galleries in the sidebar.
Kids & Glitter is this blog where all the art projects I used while volunteering as art teacher at Holy Trinity Elementary, can be found. All are complete, with patterns and directions, and free for you to use.
Since I retired, I have spent many hours gathering craft ideas and listing them in articles, on HubPages, to make them easy to find. The only crafts included in these articles have a
picture and directions for making the projects shown.
If you are looking for craft projects using a particular supply, such as craft sticks, paper plates, egg cartons, etc. or a particular subject, such as Lenten crafts, Indian crafts, Christmas, Easter, etc. check out my profile page on HubPages.
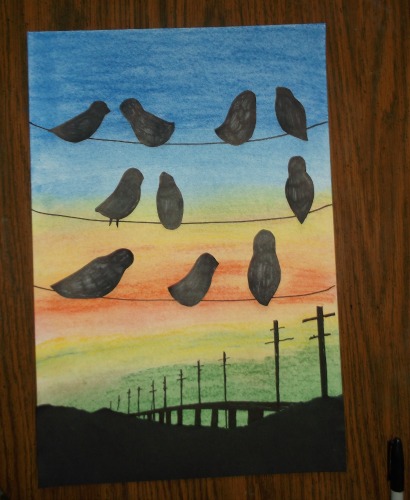
The art project shown above is called “Party Lines” and is found under the 5th Grade Gallery in the sidebar.
CALENDAR PAGE BUTTERFLY
Teachers: I think you and your students will love making these butterflies. They look beautiful adhered to a mirror or on a window.
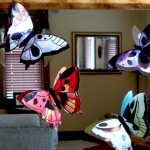 I’ve always hated to throw away old calendars because of the beautiful colored photos. This project is so easy to do and the results are fantastic. To get the instructions for making these calendar butterflies, you’ll need to go to “Best Calendar Page Butterfly” in the HubPages Projects Gallery in the sidebar.
Any calendar page can be used. Click on the image above to get a larger view.
BEAUTIFUL BUTTERFLY SUN CATCHERS
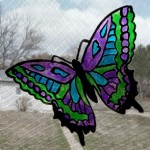 Make your classroom bright and cheerful by displaying a beautiful array of butterfly sun catchers on your windows. You’ll need transparency film and sun catcher paints for this project. The sun catcher paint gives the best results, but you can use permanent markers also. You’ll find the directions for making this project, “Butterfly Sun Catchers” in the 5th Grade Projects Gallery in the right sidebar.
FOIL ART ALA WILLIAM DANIELS
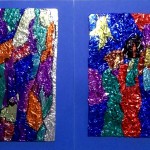 William Daniels is a young artist, born in 1976 in Brighton, England. Daneils uses oil paints on wood to create his trompe l’oeil styled art. Before making his art, inspired by famous historical paintings, he constructs models of what he wants to paint using common materials like tinfoil, paper and cardboard. Then he painstakingly recreates the look in oil paints.
Included in this project is a PowerPoint presentation of Daniels’ art. Find the instructions for this project, “Foil Painting ala William Daniels,” under the 5th Grade Projects Gallery in the right sidebar.
HAPPY EASTER BUTTERFLY CARD
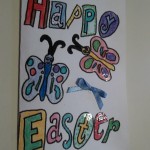 This is an easy Easter card for the kids, in any grade, to make. Because everyone can use the colors they want on the card, you’re sure to get many unique cards. I used colored pencils to color this card, but crayons, watercolors, watercolor pencils or colored markers could be used. The butterflies are left blank on the pattern so each individual can draw in face and wing features. Karo syrup gives the greeting and butterflies the shiny look. Click on the image to get a full picture. The directions for this project, “Happy Easter Card,” can be found under the Easter Projects Gallery in the right sidebar.

