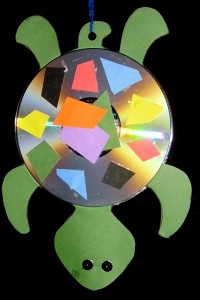
The painted turtle is just one of nature’s beautiful reptiles. The construction paper body of our turtle is sandwiched between two CDs that form the shells. Our little hanging turtle has assorted sequins attached with glitter glue on one side; and is decorated with colored paper bits on the opposite side.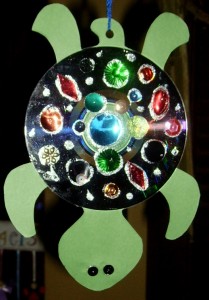
- Construction paper
- Turtle body (Pattern)
- CDs (two per turtle)
- Colored paper scraps
- Scissors
- Glue stick
- Assorted sequins
- Glitter glue
- Paper punch
- Yarn or cord
Directions:
- Print out the turtle body on construction paper or cardstock.
- Cut out turtle body. Using the glue stick, glue the body to the label side of one CD. Apply glue to the second side of the body and glue the second CD to it, matching the two CDs.
- Glue two black sequins to each side of the turtle head for the eyes.
- Punch a hole in the turtle tail. Tie a length of yarn or ribbon to use for hanging.
- On one CD, cut shapes from colored scraps and glue to the CD with the glue stick.
- On the second (opposite side) CD, use glitter glue and assorted sequins to decorate. Let dry flat, so the sequins don’t move on the glue while drying.
2nd Grade Projects Gallery:










Can you please send me the turtle pattern. I am not able to open it. Thanks!
צב חמוד מ×ד ×”×›× ×ª×™ לגן מובייל . תודה
I just love all these art idea’s
Pingback: Sea Turtle Unit Study | Homeschooling Resources
I made these with my Brownie unit tonight and they absolutely loved them! Thanks for sharing the idea and pattern 🙂
can you send me the turtle pattern because for some reason I am not able to pull it up at school? Thank you
The paper items will stick with a glue stick. The heavier gems or buttons need to be put on with glitter glue, Elmers glue or you probably could use warm (not hot) glue.
Those items will stick to the CD’s with a glue stick?!
These are really cute………plan to make a couple to hang in the window…….just for fun!!!